Want to know how to fix After Effects cached preview error? If your After Effects application is struggling to play back or create preview files efficiently – here's how to fix it.


After Effects is a powerful tool for motion graphics and visual effects, but like any software, it’s not without its quirks. One common issue users may encounter is the “Cached Preview” error in After Effects.
This error can be frustrating, as it interrupts your workflow and prevents you from previewing your compositions smoothly. In this blog post, we will delve into what the After Effects Cached Preview error is, explore effective troubleshooting methods to fix it, and address some common FAQs related to this error.
What Is the After Effects Cached Preview Error?
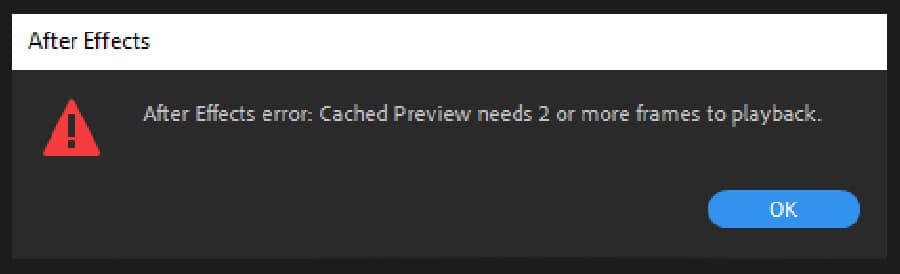
The Cached Preview error in After Effects occurs when the application cannot efficiently playback or create preview files. This can lead to laggy playback, freezing, or even crashes. The error is usually accompanied by a warning message indicating that the cached preview needs to be cleared or that the disk space for cached previews is full. This issue often arises when working with large or complex compositions that require substantial system resources.
How to Fix the “Cached Preview Error”
Let’s look at some of the most common causes for the Cached Preview error and the steps you can take to fix it!
1. Clear the Disk Cache
- Open After Effects and go to Preferences > Media & Disk Cache.
- Locate the Disk Cache section and click the “Empty Disk Cache” button.
- Confirm the action and allow After Effects to clear the cached files.
- Restart After Effects and try previewing your composition again.

2. Adjust Disk Cache Settings
- In the Preferences > Media & Disk Cache section, increase the maximum disk cache size if it’s set too low.
- Consider changing the cache location to a drive with more available space.
- Experiment with different cache settings to find the optimal balance between performance and disk space usage.
3. Disable Hardware Acceleration
- In some cases, enabling hardware acceleration can cause issues with the cached preview.
- Go to File > Project Settings.
- Then select the option “Mercury Software Only” under Video Rendering and Effects.
- Restart After Effects and check if the cached preview error persists.

4. Update GPU Drivers
- Outdated or incompatible GPU drivers can contribute to cache-related issues.
- Visit the manufacturer’s website for your graphics card and download the latest drivers.
- Install the updated drivers and restart your computer before launching After Effects again.
5. Optimize Composition Settings
- Evaluate the composition’s settings, especially if it contains high-resolution assets or complex effects.
- Reduce the resolution, turn off unnecessary effects, or use proxies for smoother previews.
- Consider pre-rendering sections of the composition to alleviate the strain on system resources.
6. Close Unnecessary Applications
I habitually leave Premiere Pro open while working on After Effects projects. If you have a lot of applications open on your machine, you may need to close them out so After Effects isn’t competing for memory. Close any unnecessary applications, including Spotify, iTunes, browsers like Google Chrome, and other Adobe apps. If you must have music, I recommend listening on your phone or a tablet if you can’t stand the silence.
7. Increase the RAM
If you need multiple programs open simultaneously, Adobe will let you set how much RAM is allocated to those other programs. Go to Preferences > Memory to view the RAM allocated to Adobe and drag the RAM number as high as it will go. You can change this later if you need more RAM for other programs.

8. Change Disk Cache Location
Adobe After Effects will struggle to read and write files in the same location. For the best results, ensure your cache location is on a separate SSD from your media and video assets. Adobe recommends using a dedicated SSD strictly for your media cache.
To change the disk cache locations, go to After Effects > Preferences > Media and Disk Cache > select ‘Choose Folder‘ under Disk Cache.

9. Change Preview Quality
The fastest way to reduce the size of the file being written to your RAM is to reduce the preview quality on your machine. To change this, hit the menu at the bottom of the composition panel. By default, it should be set to ‘Auto.’ If you have a complicated project that won’t render, go ahead and reduce this to half, third, or quarter. There are also some handy keyboard shortcuts for doing this:
- Full: Cmd + J
- Half: Cmd + Shift + J
- Quarter: Cmd + Opt + Shift + J
10. Organize & Simplify Your Project
Streamlining and organizing your projects can significantly enhance After Effects’ rendering performance. If you’re facing challenges with multiple nested pre-comps, it’s time to review and simplify your project structure. Consider dividing them into smaller sections for extensive projects, allowing you to work on each part independently.
Another crucial aspect to assess is the sizing of your pre-comps. Importing graphics can result in compositions with substantial dimensions, impacting performance. Although these large comps may be scaled down later, After Effects must still process the entire pre-comp file.
To optimize efficiency, ensure your pre-comps are the appropriate size for their intended use.
Eliminating unused footage or imported files can contribute to a more streamlined project. While this step is typically done during project archiving, removing new assets can help improve system speed. Go to File > Dependencies > Remove Unused Footage to tidy up your project.
Optimizing effects within your project is another valuable consideration. Some After Effects effects can be computationally intensive, affecting playback performance. Test your project by temporarily disabling effects to observe any improvements in playback. If feasible, transfer effects to adjustment layers, allowing for easy toggling on and off as needed.
Common FAQs about After Effects’ Cached Preview Error
Let’s review some frequently asked questions about the Cached Preview error in After Effects.
1. Why does the Cached Preview error occur?
The error can occur for various reasons, including insufficient disk space, improper disk cache settings, hardware acceleration conflicts, or outdated GPU drivers. Even hitting the RAM preview button too quickly in succession can cause the error.
2. Can I manually delete cached preview files?
Yes, you can manually delete cached preview files by navigating to the disk cache folder specified in the preferences. However, it’s recommended to use After Effects’ built-in “Empty Disk Cache” feature to ensure proper cleanup.
3. How much disk space should I allocate for the cache?
The amount of disk space allocated for the cache depends on the size and complexity of your compositions. Adobe recommends allocating as much space as possible on a separate SSD from your project files.
4. Can I move the disk cache to another drive?
You can change the cache location to another drive with more space. Specify the desired cache folder location in the Preferences > Media & Disk Cache section.
Get Started with After Effects on Envato Elements Today
We hope this blog helps you spend less time troubleshooting and more time creating! While you’re here, read up on these Top 10 After Effects Templates for 2023 and check out this Tuts+ course on After Effects for Beginners. Or, head to Envato Elements to start creating today!


